How to Revive Sourdough Starter: Remedying a Starter to Bake Again
If you’ve found your sourdough starter looking a bit worse for wear, don’t rush to throw it out. A sourdough starter is remarkably resilient; many starters that look beyond hope can be restored to full health with a bit of care. Whether it’s been neglected in the back of your fridge or left on the counter just a bit too long, the path to revival is straightforward.
Reviving your sourdough starter involves assessing its condition, removing any unwanted hooch, and beginning a feeding schedule to encourage yeast and bacteria activity. The process demands patience as you may need to wait several days for your starter to show signs of bubbling and growth. But don’t be discouraged—by monitoring the starter’s appearance and smell, and providing regular feedings, you can often bring it back to a vigorous state, ready for baking.
Key Takeaways
- Evaluate the state of your starter and get it cleaned up.
- Follow a consistent feeding routine to reinvigorate yeast and bacteria.
- Observe changes and adjust your method to maintain a healthy starter.
This post is all about how to revive sourdough starter.
Table of Contents
Assessing Your Sourdough Starter
Before attempting to revive your sourdough starter, it’s important to determine whether it is still viable. Start by examining the surface. A thin layer of liquid, known as hooch, indicates fermentation but may also signify that the starter is hungry and in need of feeding. Hooch can often be confused with mold as they can look very similar. Dark patches can form in the starter and look like mold. However, this is actually the hooch.
To tell the difference between mold and hooch, look really close at its appearance. Mold has a fuzzy appearance, while hooch is a liquid and byproduct of the fermentation process. If there are any hints of mold, get rid of the starter and start over.
Below are some additional tips for assessing your starter.
Visual Check
- Clear or lightly tinted liquid on top can be poured off; this is typical.
- A pink or orange hue may indicate contamination and the starter should likely be discarded.
Smell
- A healthy starter has a pleasant, tangy aroma.
- Off odors that are reminiscent of unpleasant smells may be a sign of bad bacteria.
Texture
- A creamy and smooth texture is a good sign.
- If you notice an excessively watery texture or any color changes in the starter itself, it might be unhealthy.
Remember, a sourdough starter with mold should not be revived. Check for any signs of fuzzy or colored mold on the surface or sides of the container.
Activity
- Try feeding your starter with equal parts flour and water and wait for 4-12 hours.
- Look for bubbles and an increase in volume, which indicate a healthy reaction.
If your sourdough starter passes these assessments with no signs of mold and a generally healthy appearance, it’s ready for revival. If you’re unsure or see signs of spoilage, it’s recommended to start over to ensure food safety.
Revival Steps
Reviving your sourdough starter involves feeding it with flour and water, monitoring its activity for signs of bubbling and growth, and committing to a schedule of repetitive feedings until it’s active.
Feeding the Starter
To begin the revival, discard all but 1/4 cup of your sourdough starter. Feed it with equal parts of flour and water. For instance, mix 1/4 cup of starter with 1/4 cup of water and 1/4 cup of flour. Stir until well combined, cover with a cloth, and let it sit at room temperature.
Monitoring Activity
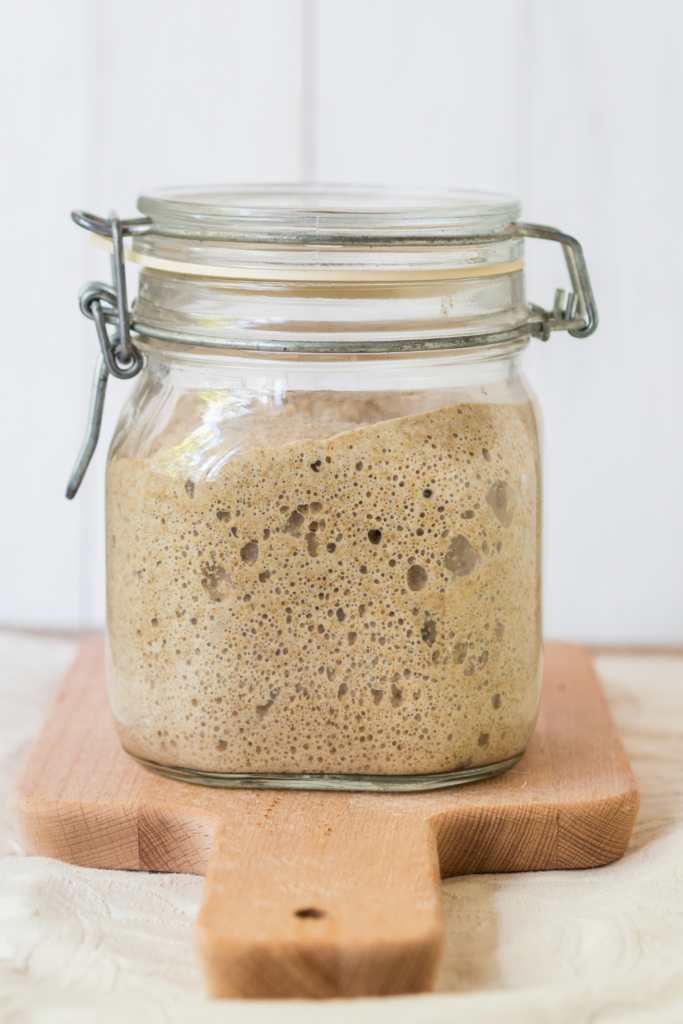
After feeding, watch for any signs of bubbling and growth within the next 12-24 hours. This indicates that the yeast is consuming the new flour and multiplying. The starter should have a pleasant, slightly sour, and yeasty smell. If a dark liquid forms on top, that’s ok. This is called the hooch. Poured off the liquid before the next feeding.
Repetitive Feedings
If there is no activity after the first feeding, repeat the feeding process every 12 hours, maintaining the ratio of starter to flour and water. It may take several days of repetitive feedings for your starter to show consistent signs of activity/
Troubleshooting Common Issues
When your sourdough starter isn’t behaving as expected, it’s crucial to identify and address the issues promptly. Here are some of the most common problems and their solutions:
- Lack of Rising: If your starter isn’t doubling in size, assess the frequency of feedings. Increase feeding to twice a day and ensure the water-to-flour ratio is consistent. Warmer temperatures can also help.
- Unpleasant Odor: A healthy starter should smell pleasantly sour. If the smell is off-putting, discard a portion and refresh with new flour and water. Review your starter maintenance routine, paying special attention to consistent feeding schedules.
- Surface Liquids: A layer of liquid, often called “hooch,” indicates your starter is hungry. Pour off this liquid and give your starter a robust feeding. Learn more about starter hydration and maintenance for an active and bubbly sourdough starter.
- Mold Growth: If mold appears, it’s best to start over. To prevent future mold, make sure your utensils are clean and store your starter in a clean jar.
Here’s a quick troubleshooting table for reference:
| Issue | Solution |
| Starter not rising | Increase feeding frequency; adjust temperature. |
| Bad odor | Discard part of the starter; feed with fresh flour and water. |
| Liquid on surface | Pour off “hooch”; feed your starter. |
| Mold growth | Discard all; begin anew with proper hygiene. |
Remember that each sourdough starter has its unique personality. Patience and regular attention will bring it back to life and ready for baking.
[RELATED POST: Troubleshooting Guide: Sourdough Starter Not Rising and How to Fix It]
Maintaining Your Revived Starter
Once your sourdough starter is revived successfully, consistent care is essential. Taking care of it and being consistent will keep it healthy for baking. Adhering to a regular feeding schedule is the cornerstone of a thriving starter.
Daily Feeding:
For a starter kept at room temperature:
- Feed it once a day.
- Use a 1:1:1 ratio of starter:water.
Weekly Feeding:
If stored in the fridge:
- Feed it once a week.
- Allow the starter to sit at room temperature for a few hours after feeding.
Flour Selection:
- Whole grain flours invigorates starters because of their high nutrient content.
- A mix of whole grain and white flours offer both nutrients and structure.
Hydration Level:
Sourdough starter hydration is typically between 65% to 90%. How hydrated it is will depend on your preferences. Follow the below for proper hydration:
- Use equal parts water and flour by weight.
- Adjust the water amount based on your desired consistency and local climate.
Dos and Don’ts:
Do:
- Keep in a clean jar.
- Cover loosely to allow gasses to escape.
- Discard a portion before each feeding to avoid overaccumulation. Once it has become re-established, you can start saving your discard.
Don’t:
- Use chlorinated water which can inhibit yeast activity.
- Seal the jar tightly; a breathable cover is ideal.
- Neglect your starter by skipping feedings.
Maintain a consistent temperature and environment to minimize fluctuations in your starter’s behavior. Keeping a vigilant eye on any changes, such as off-odors or color changes, can also be crucial indicators of your starter’s health.

Frequently Asked Questions
In this section, you’ll find targeted answers to common questions about reviving and maintaining your sourdough starter.
How to revive sourdough starter from the fridge. What are the steps to reactivate a sourdough starter that has been refrigerated?
To reactivate a refrigerated sourdough starter, remove a small amount from the fridge, discard any liquid on top, and feed it with equal parts flour and water. Allow it to sit at room temperature until it shows signs of activity, such as bubbling, which typically takes a few hours to a day.
By following these easy steps, you’ll know how to revive sourdough starter from the fridge.
How to revive frozen sourdough starter. Can a sourdough starter be revived after it has been frozen, and if so, how?
Yes, a sourdough starter that has been frozen can be revived. Thaw it in the fridge overnight, then feed it with flour and water at room temperature. Patience is key as it might take a few feeding cycles to restore full activity.
By following these easy steps, you’ll know how to revive frozen sourdough starter.
How can you tell if your sourdough starter is no longer viable?
If your sourdough starter has mold or an unpleasant odor, it may no longer be viable. Additionally, a starter that shows no signs of bubbles or activity after several feedings may be dead.
What should you do if your sourdough starter is not rising as expected?
If your sourdough starter isn’t rising as expected, make sure you’re using the right flour-to-water ratio during feedings, keeping it at a consistent temperature, and giving it enough time to ferment. Sometimes, it may just require more frequent feedings to gain strength.
Is it possible for a sourdough starter to spoil in the refrigerator, and what are the signs?
A sourdough starter can spoil in the refrigerator; signs include visible mold, a pink or orange tint, or a strong, unpleasant odor. If you notice any of these signs, it’s best to discard the starter and begin a new one.
What techniques can you use to strengthen a weak sourdough starter?
To strengthen a weak sourdough starter, feed it more frequently with a consistent flour-to-water ratio. Using whole-grain flours or rye can provide additional nutrients that may help boost activity.
Other Posts You May Like
- Troubleshooting Guide: Sourdough Starter Not Rising and How to Fix It
- What’s the Best Sourdough Starter Jar?
- How to Make Sourdough Discard and Put It to Use
This post was all about how to revive sourdough starter.